
|
Sloan Digital Sky Survey
|
|
|
|
VO Enabled Mirage
|
About Mirage
Mirage was
developed at Bell Labs by Tin Kam Ho. The application below is a wrapper around
Mirage, without modification of Mirage itself.
Mirage must be downloaded from the Bell labs site directly (link at bottom of
page).
VO Enabled Mirage
Mirage, screenshot below, uses the IVOA Client
Package to load VOTables for analysis of Virtual Observatory Data as well as
the IVOA FITS Package for FITS image
support.
Mirage is a Java-based software tool for exploratory analysis and visualization
of classification and proximity structures of multi-dimensional numerical data
from an arbitrary domain of study. The tool shows projected images of point
classes and traversals of proximity structures in one, two, or higher
dimensional subspaces, in linked views of tables, histograms, scatter plots,
parallel coordinate plots, graphs, and trees, and over image or hypertext
backgrounds linked with the data. It also provides facilities for arbitrary
plot configuration, manual or automatic classification, and intuitive graphical
querying. Analysis and visualization operations are controlled by a small,
interpreted command language.
For more information on Mirage, see the official Mirage web page at
http://cm.bell-labs.com/who/tkh/mirage/index.html.
This version of Mirage allows loading of VOTable data from files, Cone and SIAP
Searches, and SDSS CAS searches.
Using Mirage to Access VO Data
Detailed instructions on how to use Mirage may be found at
http://cm.bell-labs.com/who/tkh/mirage/index.html.
There are two ways to access VO data outlined below.
Local VOTable XML files
In order to load a VOTable data file, simply load it as you would load any
other data file. Under the "Console" Menu, choose "New Dataset" and use the file
browser to locate your file. You may also specify the file name(s) on the
command line when you start mirage.
Cone/SIAP and CAS Search
A VO specific menu entry has been added to the "Console" menu,
namely "New Dataset from VO Source...". Upon choosing this option, a dialog
appears offering the option of "CONE" or "CAS". CAS allows a query to be sent
to the SDSS Skyserver. Cone and SIAP query the
registry
and offer a list of Cone and SIAP Services and the ability to put in the RA,
DEC and SR parameters to send to the service(s). The VOTables returned by
the Cone services are loaded as separate datasets in Mirage, and the image
URLs returned by the SIAP service(s) are added to an option list in the
astronomical imaging module (see below for details on this module).
As of VO Enabled Mirage Version 0.2, there is a Task Manager which pops up when
data is being loaded. This exists primarily to give users a way to cancel
connections to non-responsive remote VO sources. To cancel a connection,
select the associated task in the Task Manager and click
"Cancel Selected Tasks". If the Task Manager becomes cluttered with cancelled
and completed tasks, you can clear out old tasks by selecting them and pressing
"Clear Selected Tasks". Note that if you try clearing a task which is running,
the Task Manager will cancel the task and then clear it.
The Cone/SIAP/CAS dialog and the Task Manager are also distributed separately
in the IVOA Client Package for use by other
Java applications.
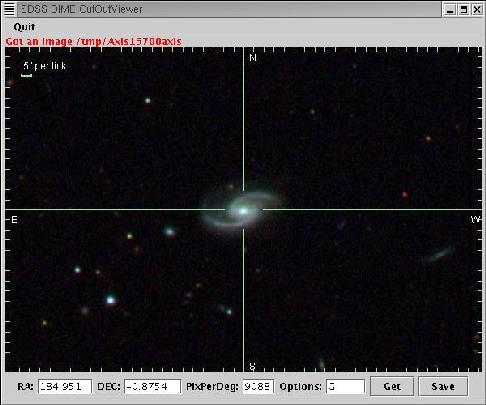
Astronomical Imaging Module
Overview
There is now an imaging module which allows viewing of FITS images as well as
JPEG and GIF images. The imaging module uses classes included in the JSky
application for WCS support, as well the colormaps which come with JSky, all of
which are included in the VO Enabled Mirage distribution.
Access
To access the imaging module with the new version of Mirage, select the
multi-panel tab pane from the dataset view, then drag the spiral galaxy icon
found on the lower left tool palette into one of the module panes.
Image Loading
Image loading is fairly straightforward using the "File" menu in the imaging
module's menu bar. Images can be loaded from any URI including file and HTTP
URIs. If any SIAP searches have returned image URLs, you may also select from
among these in the pulldown menu on the combo box in the file loading panel.
Please Note
Currently, when loading images, the imaging module runs in the main thread and
blocks until loading is finished either normally or abnormally. On very large
images, like many astronomical images tend to be, this can give the impression
that the application is frozen. In every case that we have tested, the
application has returned. Fixing this flaw is a planned future enhancement.
Axis Selection
Image axes, in either image coordinates or WCS for those images with WCS
information, may be related to dataset columns using the "Data/Axes" menu.
Images have x and y axes which can be associated with dataset columns. Images
with WCS information also have RA and Dec axes which can be associated with
appropriate columns. Thus, for instance, one can select data rows in
the table view, then press the broadcast button found at the bottom of the tool
palette on the right, and if the image coordinates obtained from the RA and Dec
fields of the dataset fall within the image boundaries and the correct axis
association has been set, the associated points on the image will be circled.
Data Point Selection
Selections can be made in the imaging module itself by selecting the rectangular
selection tool in the toolbar and then selecting as one normally would in any
other application. The selection can then be broadcast to the other view
modules by pressing the broadcast button. Data points can be marked with
different colors via the color palette which can be accessed by pressing the
colored grid icon in the middle of the tool palette on the right side.
Zoom, Brightness/Contrast, Colormaps
You may zoom in on a region of the image by selecting either the "zoom in" tool
or the "zoom out" tool in the toolbar and then clicking on the image. The
zoomed image will be centered on the position which was clicked. Both zoom
tools can have their behavior inverted by pressing and holding the control key.
Brightness can be controlled with the bias control, the top slider on the right
side of the pane, and contrast can be controlled with the bottom slider right
below the bias slider. Colormaps may be selected and inverted using the "Color"
menu.
Synchronized Zoom and Pan
For FITS image with overlapping WCS ranges, zoom and pan operations are
synchronized. That is, if you zoom in one FITS image, all other FITS images
are zoomed to the same scale factor. If you pan in one FITS image, any FITS
images which contain the new center point (in WCS) will also center on that
point. Images without WCS or with a WCS range not containing that point will
silently do nothing. However, all FITS images will zoom to the same scale
factor regardless of whether they overlap. One known bug is that if an image
is flipped, it must manually be recentered either by panning in normal fashion
or by "jiggling" another image whose center point is contained in the flipped
image. This will be fixed in a later version. Finer grain control over which
image panel synchronization may be added later if there is sufficient user
demand.
Intensity Scaling
Different intensity scalings may be selected using the "Scale" menu. Several
common scalings are available. Please note that the Histogram Equalization as
implemented is just that; it adjusts values to make the histogram curve more
nearly approximate a uniform distribution curve. Also, a relatively new scaling
using the inverse hyperbolic sine function is available. More information on
this scaling is available in
Lupton 2001. The parameterization used here follows the Beta
parameterization mentioned there, except that we call "Beta" "sigma" for some
reason. The image module attempts to estimate a reasonable sigma value. This
value may be adjusted using the "Scale Parameters" dialog available via the
"Scale" menu. Minimum and maximum values may also be set using this panel.
Running VO enabled Mirage
VO Enabled Mirage depends on Mirage. There are two different jar files and a
configuration file which must reside in the same directory in order to run
VO Enabled Mirage. One of the jar files contains the original Mirage
distribution, and the other contains the VO-related extensions. The
configuration file notifies Mirage of the presence of the VO-related extensions
so it can make them accessible. After you have downloaded all three
distribution files, create a new directory for Mirage, then move the original
Mirage distribution file into that directory and unpack it. To unpack the
Windows version, use pkunzip or WinZip or whichever utility you like to unzip
the Mirage distribution file, which will be called mirage0.3.zip. To unpack the
Linux/Solaris version, type
gunzip < mirage0.3.tar.gz | tar xfv -
Then put the sloanNoMirage-3.5.jar file and the Property.dat file in the
directory you created. You may then run VO Enabled Mirage by typing
java [-Xmx1024M] [-Dregistry="http://www.exampleregistry.edu/and/so/on.html"] [-DCAS_URL="http://www.somecasserver.edu/CasService.asmx/GetVoTable?"] [-DVOTParser="javot"] -jar sloanNoMirage-3.5.jar [datafile1 datafile2 ...]
The optional "-Dregistry=..." argument allows you to specify an NVO
registry server other than the default. Possibilities are (these are the
defaults):
http://nvo.stsci.edu/voregistry/registry.asmx
http://voservices.org/registry/registry.asmx
The optional "-DVOTParser=..." argument allows you to use
JAVOT for parsing VOTables
instead of SAVOT.
The option "-DCAS_URL=..." argument allows you to use a different CAS server
from the default.
The optional "-Xmx1024M" argument tells the Java Virtual Machine to use as much
as 1024MB of RAM. You can, of course, substitute other values for 1024. The
Java Virtual Machine will only use as much RAM as it needs up to the amount you
specify. The default value is 32MB, so it's easy to run up against that
ceiling with a large dataset and/or a large image. Please note that VO Enabled
Mirage requires
JRE version 1.4.2 or
higher.
Download Jar Files
|
Newest version of VO Extensions (v3.5)
|
This executable jar needs a Mirage (version 0.3) jar in the same
directory. Mirage must be obtained from Bell Labs.
|
|
Mirage
|
Select Mirage from the list and follow the instructions for download.
Version 0.3 of Mirage is required for VO Enabled Mirage.
|
| Property.dat |
In order for Mirage to detect the astronomical imaging module, this
configuration file, "Property.dat", must be present in the directory from
which Mirage is invoked.
|
Older Jar Files
|
Version 3.4 VO Extensions
|
This executable jar needs a Mirage (version 0.3) jar in the same
directory. Mirage must be obtained from Bell Labs.
|
|
JAI 1.1.1_01
|
JAI is required for the astronomical imaging module to work. The JRE
install for the appropriate OS is recommended. Installation notes are
here.
|
| Version 2.2 VO Extensions |
This executable jar needs a Mirage (version 0.3) jar in the same directory
and a working JAI installation. Mirage must be obtained from Bell Labs.
|
Samuel Carliles
Last Modified :Tuesday, September 12, 2006 at 4:17:14 PM
, $Revision 1.16 $